
To create a personal health binder, start with a zippered, tabbed binder and page protectors for durability. Add sections for medical details, emergency contacts, medications, lab results, insurance, and legal documents. Include a one-page ER snapshot with readings, allergies, and medications for quick access. Update entries within 24 hours of changes, and review the whole system quarterly. Keep going below to see exactly how each section comes together.
TLDR Key Takeaways
- Use a zippered, water-resistant binder with tabbed dividers, color-coded sections, and page protectors for organization.
- Place a master summary sheet and one-page ER snapshot with vitals, meds, allergies, and contacts up front.
- Build a care team list with roles, contact methods, and a nearby plus out-of-area backup contact.
- Maintain a complete medication list and log appointments, visit notes, and follow-ups per family member.
- Store lab results, insurance cards, and billing statements in labeled, chronological, encrypted, backed-up sections.
Pick the Right Binder and Supplies

Since your health binder needs to survive both daily handling and worst-case scenarios, start with a zippered binder that keeps documents secure during transport and accessible when seconds count.
Prioritize material durability: reinforced rings won’t snap under heavy loads, and water-resistant construction protects records from spills or storms.
Stick to a compact 9×11-inch size so it fits in backpacks, cup holders, or emergency kits without dragging you down.
Build in accessibility features from the start. A clear front pocket gives you instant access to emergency contacts and insurance cards. As your collection grows, look for options with pockets, handles, and zip closures to accommodate larger records.
Fill it with top-loading, anti-static page protectors (3–5 mil thick) so you can swap records fast without tearing.
Grid lines or tabs keep sections visually organized—no guesswork, no wasted time when it matters most. Consider using distinct fonts or colors for different history categories so past medical events, surgeries, and hospitalizations are instantly distinguishable at a glance. Since more than half of Americans take an average of four prescription medications, dedicate a labeled section specifically for your medicine chart so dosage details are never buried among other records.
Organize Your Medical Binder With Tab Dividers
With your binder and supplies ready, it’s time to give every document a home.
Tab dividers free you from digging through loose papers when it matters most.
Separate sections for primary care physicians, specialists, procedures, and legal forms so nothing gets buried. At minimum, plan for at least 8 tabbed dividers to cover the essential categories of your health information.
If you’re managing care for multiple people, create family sections with individual tabs so each person’s records stay distinct. Consider using 12-month dividers within each family section to further organize visits by date.
Use color tabs to speed up organization—assign a color per category, coordinate colors with subject names, and reserve one shade exclusively for test results.
Add a tab for emergency services like Air Evac for instant access during crises. Placing this tab at the back of the binder keeps critical, life-saving information within easy reach when seconds count.
Within each tab, file paperwork chronologically, newest to oldest, so you always find current information first without wasting time flipping pages.
Add Core Personal and Medical Details
Once your tabs are in place, start filling the front section with the personal identification details that identify you fastest in an emergency. Write your full legal name, date of birth, gender, and blood type clearly for instant identity verification. Note your primary language so responders know your language preferences before treatment begins.
Behind this page, document chronic illnesses with diagnosis dates, allergies with specific reactions, and past significant medical events. List adverse medication reactions and any assistive devices you use—this protects you when you can’t speak for yourself. Add a master summary sheet, including current medications, allergies, and emergency contacts, at the very front of this section for quick reference.
This section isn’t paperwork for paperwork’s sake—it’s leverage. When you control the narrative of your own health, you’re not at the mercy of guesswork or rushed assumptions. Accurate details here mean faster, safer care, and more autonomy over decisions made about your body.
Build Your Emergency Contact and Care Team List
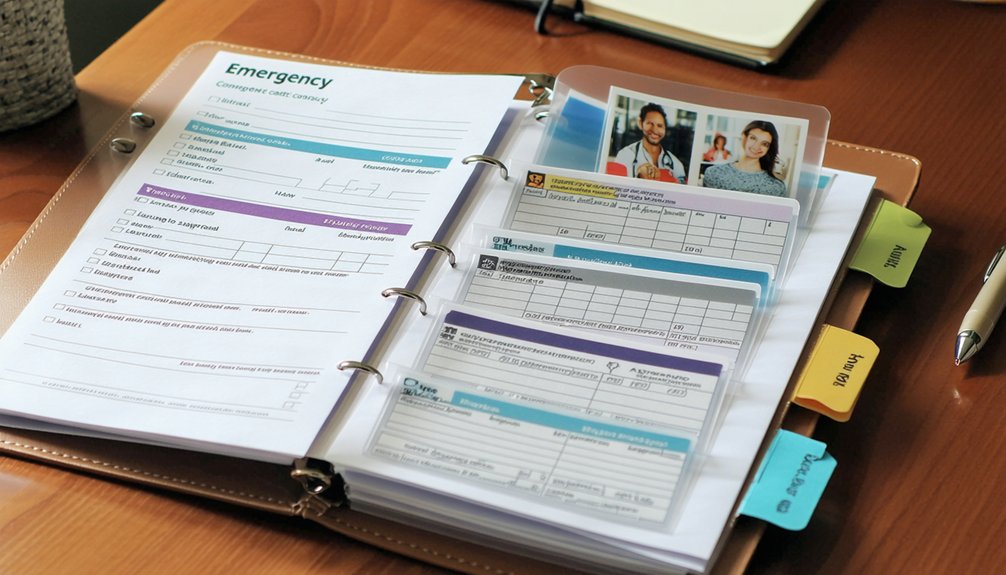
Your medical details won’t help much if responders can’t reach the right people fast. Build a care team, not just a list. Choose one or two nearby contacts—a spouse, parent, or adult child who can respond quickly. Add an out of area backup in case local networks or roads fail during widespread emergencies.
Assign real roles: who makes medical decisions, who picks up kids, who just needs logistics updates. Label relationships clearly so responders know who’s who.
For each contact, record full name, cell, home and work numbers, email, and address. Verify everything’s current before finalizing. Also note the best method to reach each person, whether that’s a call, text, or going through a receptionist.
This isn’t paperwork—it’s freedom to act decisively when panic sets in. Confirm each contact’s willingness, then test the system with practice alerts. Include a back-up childminder or alternate carer number in case your primary contacts are unavailable during a crisis. Make it a habit to review and update the list at least once a year so contacts, numbers, and addresses stay accurate.
Create a Medication Tracking System That Works
Medication errors often happen not from lack of care, but from scattered information—so start by building a single, complete list. Include each medicine’s name, strength, purpose, and exact instructions—when, how, and how much to take. Add allergy information and emergency contacts alongside it.
For adherence tracking, pair a weekly pillbox with separate daily sections with an app like Medisafe or MyTherapy. These tools store your dose history and only alert you when you’ve missed a dose—no unnecessary noise. Set a fixed daily routine for taking medications, and update your list immediately whenever something changes. Many of these apps also offer refill prompts so you never run out of an important prescription unexpectedly.
Conduct medication reconciliation annually: gather every prescription, OTC remedy, and supplement for review. Just as pharmacies track drugs to catch discrepancies, your own review should include verification upon receipt of new prescriptions against what your doctor actually ordered. This step matters because nearly 1 in 5 Americans use at least five prescription drugs, making careful review essential to catching interactions. Never stop a medication without your physician’s guidance. Your list is your freedom—keep it current, keep it accessible.
Log Appointments and Doctor Visit Notes
Because appointments generate scattered details fast, you need a dedicated planner or digital calendar to log every visit, test, and referral before you walk through the clinic doors. Include the patient’s name, contact number, email, and location for each entry, along with the doctor’s name and the visit’s purpose. Keep separate logs for every family member to avoid mixing schedules.
During the visit, ditch loose paper. Bring a notebook and use appointment tagging to sort entries by person, specialist, or condition instantly. Visit templates speed this up—structure each entry with diagnosis, treatment plan, medications, and follow-up date built in. This matters because patients typically forget 40–80% of the medical information given to them almost immediately after leaving the office. If recording, get consent first, save the audio, and order a transcript. Always ask before recording, since eleven states require multi-party consent from everyone present. This system frees you from chaos and gives you instant recall when it matters most.
File Lab Results and Imaging Reports

Once appointment notes fill your binder, lab results and imaging reports need their own system. Sort by category—blood tests, urine analysis, biopsies, X-rays, MRI, CT, and ultrasounds—then stack chronologically to track your health progression. Give each family member a separate folder to avoid confusion between similar names or patient identifiers.
Store original PDFs, not cropped screenshots, so lab name, units, reference ranges, and specimen notes stay intact. Include seven contextual pieces: collection date, report date, lab name, units, reference range, sample condition, and ordering clinician. Name files YYYY-MM-DD-Category-Description for instant sorting.
Back up everything in encrypted archives plus an offline copy. Pull records straight from patient portals or request imaging CDs from radiology. Mark abnormal results boldly—your freedom to act fast depends on finding them instantly.
Store Insurance Cards and Billing Paperwork
Designate one fireproof, waterproof document safe or clearly labeled binder as your primary home for every insurance card, and keep it in a climate-controlled space so mold, fading, and moisture don’t compromise the contents.
Scan front and back images of each card, then save them with digital encryption in a secure cloud service or password manager for family access anywhere. Add offsite copies to a safe deposit box or trusted relative’s home as disaster backup.
Create a front binder section for due or past-due bills, and separate paperwork by medical event for clarity. Use sticky notes to track calls and payment plans. Spend 10 minutes weekly filing new documents. Retain statements three years; keep active policy cards as long as coverage lasts.
Organize Advance Directives and Legal Documents
With your insurance cards and bills sorted, your binder needs one more critical layer: advance directives and legal documents. These papers—your living will and durable power of attorney for health care—only activate when you can’t speak for yourself, so proper legal storage matters. Keep signed, witnessed or notarized copies front and center, since unsigned drafts hold no power.
Check your state’s agent qualification rules before finalizing your choice—facility employees generally can’t serve, and anyone inheriting from you shouldn’t witness the signing. Name an alternate agent too, in case your first choice can’t act.
Update these documents yearly or after major life changes, then replace old versions everywhere—your binder, doctors’ files, and any registry—so only your current wishes guide decisions.
Capture Daily Routines and Personal Preferences

Beyond legal paperwork, your binder should regularly capture the daily rhythms that reveal how you’re really doing. Track sleep patterns and bedtime routines to spot consistency or disruption. Log meals, hydration, and mark good days versus bad days for chronic illness management. Scale symptoms as they surface and note activity levels alongside them.
Vital signs matter too: blood pressure, blood sugar, heart rate, weight changes, falls, and mood shifts all belong here for clinical review.
Document taste preferences, exercise routines, bathing schedules, and mobility support needs. Include relaxation habits and favorite comfort items that ease stress.
Finally, define your communication style, ideal daily schedule, cultural considerations, cognitive strengths, and prompts—giving caregivers a clear map to support your autonomy, not just your symptoms.
Make a One-Page Emergency Snapshot for the ER
When seconds count in the ER, you won’t have time to flip through a binder—that’s why you need a single sheet that says it all. Lead with your name, DOB, preferred name, address, phone, and insurance details.
Add vital signs, diagnoses, current and past conditions, surgeries, recent labs, and past injuries. List medications (or reference your attached med list), allergies, and assistive devices.
Include emergency contacts, providers, and pharmacy info.
Use ER friendly formatting: bold headers, large clear font, and tight bullet points staff can scan in seconds. Pair it with wristband integration—a QR code or ICE tag linking directly to your sheet—so responders access critical data even if you can’t speak.
This is your freedom: control your story, even in crisis.
Maintain Your Health Binder So It Stays Ready
A binder’s only as good as its last update. Freedom means never scrambling for information when it matters most, so build binder hygiene into your routine. Update medication lists within 24 hours of any change, and log new diagnoses or test results right after physician review. Archive outdated documents before inserting current ones—clutter defeats the purpose.
Set scheduled reviews: monthly 5-10 minute checks on allergies and contacts, a full audit every six months, and quarterly appointment log reviews. Verify provider and insurance details annually.
Back up smart—store an encrypted digital copy, keep a secondary physical binder elsewhere, and test accessibility twice yearly. This system stays reliable because you maintain it, not because you hope it holds up.
Frequently Asked Questions
Should I Make a Digital Backup or Scan Copies of My Binder?
Yes—you should scan everything. Use HIPAA-compliant cloud storage for encrypted backups, enable two-factor authentication, and keep local copies too. This frees you from paper chaos while ensuring your records stay secure, accessible, and truly yours anytime, anywhere.
Who Else Should Know the Binder’s Location Besides Me?
Tell your spouse, adult children, and primary caregiver first. Then inform your care team—doctors and home health staff—plus your emergency contacts, legal proxies, and trusted friends. Sharing this location enables everyone to act fast when it matters.
Can I Use a Health Binder for Multiple Family Members at Once?
You’ll organize each family member’s records using dedicated tabs plus shared sections for common info like insurance providers. Adopt a color coding system per person—it liberates you from digging through cluttered files during stressful emergencies.
What if My Loved One Refuses to Have a Binder Made?
Respect autonomy first—don’t force it. Try gentle persuasion instead: explain benefits calmly, share your own binder as an example, and ask open questions about their fears. Let them control the pace; offer help, not pressure.
How Do I Transfer Binder Information to a New Caregiver Quickly?
Hand over your Quick Start handover summary first—allergies, meds, diagnoses. Then walk through your contact checklist: doctors, pharmacy, POA documents. You’re not lecturing; you’re enabling someone else to take confident, immediate action.
Conclusion
You’ve now got everything you need to build a binder that actually works when it matters most. Gather your supplies, add your tabs, and fill in each section step by step. Don’t let it sit untouched—review it every few months and update it after every appointment or medication change. A health binder’s only as good as its accuracy, so keep it current, keep it accessible, and keep it ready for the next emergency.
References
- https://www.napnap.org/wp-content/uploads/Full-Patient-Toolkit.pdf
- https://www.retireguide.com/guides/medical-binder-printables/
- https://carstens.com/blogs/latest/10-essential-sections-to-have-in-a-medical-binder
- https://www.youtube.com/watch?v=2lRXrvyoiEU
- https://beruly.com/2011/05/how-to-create-a-personal-health-binder-to-organize-your-health-records/
- https://step2health.com/blogs/news/building-a-personalized-care-binder
- https://www.health-e3.com/health-care-binder
- https://amda-pompe.org/wp-content/uploads/2025/10/ORGANIZE_MEDICAL_HEALTH-_NFO_BINDER_TEMPLATE.pdf
- https://www.reddit.com/r/ehlersdanlos/comments/12r3u8o/medical_binder_what_do_you_guys_have_compiled/
- https://familycaregiversonline.net/caregiver-education/how-to-build-a-medical-binder/

